
This is the flier I made for the Realtor rally .

Certified Master Inspector, Brian Persons,based in Greeley Colorado for more than 25 yrs.Performs Home inspections along the front range.Shares tips and advise.
 Concrete sinks because its underlying support, for various reasons, gives way. The original concrete may have been installed on dirt that hadn’t been compacted sufficiently, for instance, or soil erosion may be responsible. And some soil simply settles naturally over many years. Regardless of the cause, sunken concrete can lead to many structural defects, including failed retaining walls, foundation settling, uneven junctions of concrete, sunken sidewalks, uneven concrete pads, cracked foundations, and bowed basement walls. If left uncorrected, these defects can lead to unwanted water runoff and major structural problems.
And, aside from the shabby appearance and decreased functionality of an uneven sidewalk, steps or walkway, sunken concrete can create major trip hazards for which the building owner is liable. If a building owner notices any of these conditions, they should consult with their InterNACHI inspector during their next scheduled inspection.
Process
First, small holes are drilled into the concrete, through which is pumped a slurry that may be composed of various materials, such as sand, cement, soil, limestone, bentonite clay, water or expanding polymers. The particular mixture is based on the type of application and the mudjacker’s preference. The slurry then fills any gaps and forces the concrete to rise back into place before the drilled holes are plugged up with cement, leaving the only visible evidence of the repair. Over the next day, the slurry solidifies and stabilizes the subsoil, making further sinking unlikely.
While this is not a complicated procedure, it should be performed only by a trained professional, as amateur workmanship may cause even more extensive damage. Drain pipes, sewers and utilities must be located and avoided, and the area must be evaluated as to whether it can survive the mudjacking process.
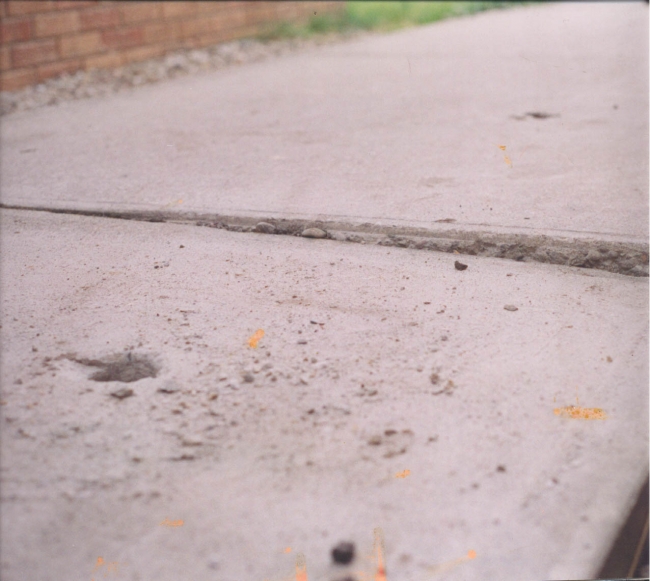
Some advantages of mudjacking over re-pouring cement include:The only evidence left of mudjacking is the patched hole through which the slurry was pumped. Photo produced by InterNACHI member Mike Morgan.
* efficiency. Mudjacking requires less equipment and fewer workers. Adjacent plants and landscaping are also disturbed less, as are neighbors, tenants and passersby by the loud noise, dust and cumbersome equipment;
* price. Mudjacking typically costs roughly half as much as concrete replacement because there is little need for new cement or the removal of old concrete. The overall cost is based on the area of concrete that must be lifted, which may be as little as $5 per foot. Thus, for a 5x4-foot job, it might cost just $60, although the mudjacker may charge more if the area is in a hard-to-reach location;
* speed. Mudjacking takes hours, while certain concrete pours may take days; and
* environmentally friendly. Mudjacking makes use of perfectly good concrete, which would otherwise be sent to a landfill.
Limitations of Mudjacking
Mudjacking may be an ineffective waste of resources in the following situations:
* The concrete surface is spalling or otherwise damaged. The mudjacking process might further damage the surface, which will still be defective even after it’s raised back into place.
* The concrete has risen, caused by expansive soil. The only solution for this defect is to re-pour the cement.
* The cause of the settling is not addressed. If the soil has settled due to some external factor, the problem must be fixed or the soil will sink again in the future. For instance, a gutter downspout that drains onto a concrete edge must be corrected in order to avoid the need for future repair.
* The underlying soil is swampy.
* There is a sinkhole beneath the concrete.
In summary, mudjacking is an inexpensive, fast and clean way to level a sunken concrete slab.
Concrete sinks because its underlying support, for various reasons, gives way. The original concrete may have been installed on dirt that hadn’t been compacted sufficiently, for instance, or soil erosion may be responsible. And some soil simply settles naturally over many years. Regardless of the cause, sunken concrete can lead to many structural defects, including failed retaining walls, foundation settling, uneven junctions of concrete, sunken sidewalks, uneven concrete pads, cracked foundations, and bowed basement walls. If left uncorrected, these defects can lead to unwanted water runoff and major structural problems.
And, aside from the shabby appearance and decreased functionality of an uneven sidewalk, steps or walkway, sunken concrete can create major trip hazards for which the building owner is liable. If a building owner notices any of these conditions, they should consult with their InterNACHI inspector during their next scheduled inspection.
Process
First, small holes are drilled into the concrete, through which is pumped a slurry that may be composed of various materials, such as sand, cement, soil, limestone, bentonite clay, water or expanding polymers. The particular mixture is based on the type of application and the mudjacker’s preference. The slurry then fills any gaps and forces the concrete to rise back into place before the drilled holes are plugged up with cement, leaving the only visible evidence of the repair. Over the next day, the slurry solidifies and stabilizes the subsoil, making further sinking unlikely.
While this is not a complicated procedure, it should be performed only by a trained professional, as amateur workmanship may cause even more extensive damage. Drain pipes, sewers and utilities must be located and avoided, and the area must be evaluated as to whether it can survive the mudjacking process.
Some advantages of mudjacking over re-pouring cement include:The only evidence left of mudjacking is the patched hole through which the slurry was pumped. Photo produced by InterNACHI member Mike Morgan.
* efficiency. Mudjacking requires less equipment and fewer workers. Adjacent plants and landscaping are also disturbed less, as are neighbors, tenants and passersby by the loud noise, dust and cumbersome equipment;
* price. Mudjacking typically costs roughly half as much as concrete replacement because there is little need for new cement or the removal of old concrete. The overall cost is based on the area of concrete that must be lifted, which may be as little as $5 per foot. Thus, for a 5x4-foot job, it might cost just $60, although the mudjacker may charge more if the area is in a hard-to-reach location;
* speed. Mudjacking takes hours, while certain concrete pours may take days; and
* environmentally friendly. Mudjacking makes use of perfectly good concrete, which would otherwise be sent to a landfill.
Limitations of Mudjacking
Mudjacking may be an ineffective waste of resources in the following situations:
* The concrete surface is spalling or otherwise damaged. The mudjacking process might further damage the surface, which will still be defective even after it’s raised back into place.
* The concrete has risen, caused by expansive soil. The only solution for this defect is to re-pour the cement.
* The cause of the settling is not addressed. If the soil has settled due to some external factor, the problem must be fixed or the soil will sink again in the future. For instance, a gutter downspout that drains onto a concrete edge must be corrected in order to avoid the need for future repair.
* The underlying soil is swampy.
* There is a sinkhole beneath the concrete.
In summary, mudjacking is an inexpensive, fast and clean way to level a sunken concrete slab.
